It seems there are dozens of ways to applique one fabric to another, and ultimately, you need to try a few methods and find the one you like the best and gives you the best results. I tend to be a hand applique person, and many of you are not, and prefer to do everything by machine. The applique in the Twilight Gardens quilt can be done by hand or machine, and this method of prepping your applique pieces can be used for either method. If you have another method you would like to use on this quilt, please feel free to do that. The main thing is that you are enjoying the technique and it is achieving the results you like.
Preparing your applique pieces
 Normally when I do applique, I like to do simple needle-turn. This eliminates the need to pre-turn the edges of your pieces. But I thought I would try a new method. I have seen this demonstrated, and it seemed like a pretty easy method and one that could be used for either hand or machine.
Start by tracing your pattern pieces onto the paper (non slick) side of a piece of freezer paper. If you need it, use a light box or a well lit window to help you see the pattern clearly. Make sure you trace an outline for each piece you will be appliqueing, as the freezer paper templates can not be reused. Label them if there is any confusion about where they go in the block design.
Cut out the templates right on the line, and separate them into piles based on the fabric that will be used for each applique piece. In this case I have flower petals in either medium or light blue, and leaves that will all be cut out of a single green fabric.

I like to use a separate pair of scissors to cut paper from the good ones I use to cut fabric with. This keeps my fabric shears sharper longer.
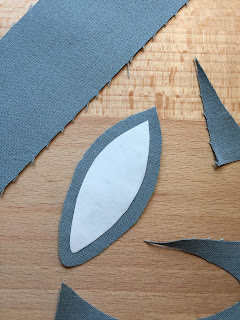
Now, using a water soluble glue stick, apply a little glue on the center of the paper (non slick) side of each template and glue them down to the wrong side of your fabric. Leave 1/2" space between all templates.
Once you have your templates glued down, using your fabric shears, cut the fabric pieces out leaving a scant 1/4" seam allowance (about 3/16" is about right) on all sides.
 Now we will start turning the raw edges of the fabric. If there are any sharp points on your applique shapes, begin by folding over the point first. Using a mini iron and a stiletto that will not melt, gently iron the seam allowance over the template, with the crease right on the edge of the freezer paper. The seam allowance should lightly adhere to the slick side of the freezer paper which is now facing up.
 Follow around the edge of your template turning the edge with the stiletto and gently ironing with the mini iron to hold in place. The example shown in the photos has all convex sides, but if your piece has a tighter concave curve or an inside point, you will need to clip into the seam allowance almost all the way to the freezer paper to have it conform to the shape easily. Clip only once for an inside point, make a few clips for a curve.
Once you make it all the way around your piece it should look like the photos below.
The next piece you need to prep is the stems. These also can be made a variety of different ways. The method I will show you here is one of the oldest. It was the first method I learned and one I still prefer for doing small bias stems.


Fold over the corner of your stem fabric forming a 45 degree angle. Cut how ever many strips you need off the corner so your strips are cut on the bias.

Fold these strips in half down the length of the strip and mark a sew line using a contrasting marking tool at a width slightly wider than your finished stem should be.
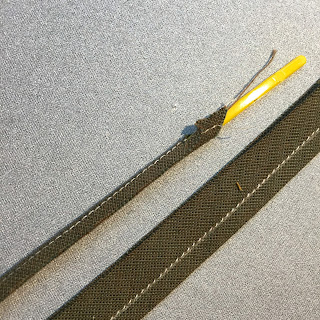
Here I am marking at a little over 1/8" for a 1/8" finished width.
Use a set of press bars for making bias strips. They come in metal, and heat resistant plastic. They both work well, but the metal ones can get hot to the touch. Stitch on your marked line and trim the seam allowance down to less than the width of your finished stem. Here I am trimming seam allowance to less than 1/8". Insert the appropriate size press bar and roll the tube so the seam can be pressed the back side of the stem and not show.
Once the seam allowance is pressed to the back, remove the bar and turn over your stem.

Pin the stems in place first. Use a fine thread with matching color to applique them down. They can be either machine sewn using a close matching thread color and a blind hem stitch, or they can be hand appliqued. I like to use Kimono brand 100 wt. silk thread by Superior Threads. It is very fine and nearly invisible. It comes in 80 colors and is strong for it's weight.
When appliqueing by hand take small stitches. Drop the needle into the background fabric right adjacent to the applique piece, then bring the needle back up slightly under the edge of the applique, and out right at the edge fold. Repeat this stitch along all edges.
Once the pieces are stitched in place, turn over the piece and locate the individual pieces with freezer paper still attached inside. CAREFULLY with a pair of applique scissors that are sharp right to the point, cut a small slit in the background directly underneath your applique piece. Be very careful to stay far from the sew edges. You just need a small hole large enough to pull the freezer paper through. Using a stiletto or pair of tweezers, grab the paper and give a slight tug to release the glue. Remove the paper from the back.

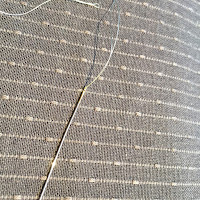
Here is trick to make your hand sewing much easier. If you use silk thread, you may have the problem of the needle coming un-threaded occasionally due to the fine thread. When you thread your needle, pull a loop of thread through the eye of the needle and loop over the point of the needle, then pull snug into a small knot at the eye. This will keep the thread put while you are sewing. When you reach the end of the thread, tie off and cut the knot off the needle by gently running the blade of your scissors along the eye of the needle.
This method of preparing my applique pieces worked very well for this project. At first I was a little concerned about cutting the back of my project to remove paper templates, but I found this was really simple and left a very small hole that does not compromise the strength of the background.
As always, I suggest trying this, as well as other methods, and choosing your favorite.


