Fabric Selection
This month we are using quite a few fabrics in our block to give it that scrappy look. My block is going to lean more toward the reds, beige and gray. I like having a couple of very distinct reds in this block, both in the center checkerboard design, and in the bordering rectangles. I also am using a couple of plaid, gray fabrics. These are only being used in the checkerboard, but really give it a lot of visual interest and some motion to carry your eyes from place to place.The fabrics pictured at right show the color range and the value changes from light to dark. The darkest at the top is the pure black that I am using for the background setting triangles.
Pattern Errors
I am just going to begin this month's article by pointing out some rather big errors in the pattern for block six.I had been really looking forward to making this block, as I think it is one of the prettiest in the quilt, and it is very scrappy, including many different fabrics. I had pre-cut all of my pieces as per the instructions and sat down to make the block. As I was assembling the different units and pieces, it became clear that the measurements for some of the pieces were wrong. Fortunately, some pieces are too large, and can just be cut down to the correct size, but some are really too small and will require re-cutting if you have already cut them out.
Under "Cutting Instructions", where it says from a Dark Fabric: The pieces for A are correct and will work, but the pieces for B - Cut four squares 3 1/4" x 3 1/4" should be larger squares. This change is necessary because of a measurement error for the center part of the block. The entire block center is a bit smaller than what is stated in the pattern, so the setting triangles, cut from the Dark Fabric, need to be a little bit larger. I would recommend cutting your B pieces from 3 3/4" squares, cut twice diagonally to create sixteen quarter square triangles.
Then under the section "From the Light Fabric" It says to cut two rectangles (piece E) 1 1/2" x 6 7/8". These should be 1 1/2" x 6 1/2". Also, for piece F, the two rectangles should measure 1 1/2" x 8 1/2" not 1 1/2" x 9".
If the center checkerboard is assembled as called for in the pattern, after pressing, the 6 x 6 checkerboard will measure 6 1/2" square. After adding the 4 border strips and pressing, it should measure 8 1/2" square, not 9" square as stated in the pattern.
Do not be alarmed by this. Continue your assembly as the pattern indicates, only substituting the larger cut B pieces as your setting triangles. This will give you enough overhang to trim your finished blocks down to 12 1/2" square. (The other error I found was under the title of the block where it says "approximate size 12 1/2" x 12" finished - this should read 12 1/2" x 12 1/2" unfinished)
I guess I was a little disappointed that this pattern was not tested and proof read, but having written patterns myself, I know how easy it is to make a error and not see it. In any case, it should not cause you much trouble, and the block will come out fine.
Assembly
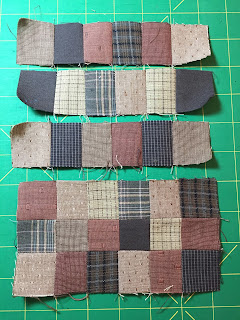
The assembly of this block is pretty straightforward. You are essentially sewing little squares together in rows, pressing the seam allowances in opposite directions on each row so they will "nest", then sewing the rows together. The final row seam allowances I pressed open to avoid too much fabric build up.The photo at left shows the final row seams pressed open to reduce bulk
Here is the block center with the intermediate border installed. These are your light rectangles (E and F). Remember to adjust your pattern and cut these at 6 1/2" and 8 1/2". They should fit perfectly.
Your next step is to assemble the corner units that will finish the block. The cutting directions of the rectangles used in these units is correct. Simply add a setting triangle (B) to each end of the rectangles, trim off the dogears, then sew the large rectangle to the smaller one, centering each piece with one another by folding in half and matching the center lines.
Add the larger corner setting triangle (A) to the smaller rectangle side of the unit, again centering the pieces together. The edges with not align properly and that is ok. They will be trimmed in the final step. Press the seam allowances toward the large setting triangle. Repeat and make 4 of these units.
Now you want to sew the corner units to the center block. Again, find the center of each side of the block, and the center of the long side of each triangle corner unit and match them when you are aligning the corner unit on the side of the block. Sew on the top and bottom first. Press. Then sew on the sides.
Your block should then look something like this, all irregular around the outside edge. If you used the larger cutting directions I gave you at the beginning of this article, you should have plenty of trimming room around the edge of your block. The easiest way to trim is to use a 12 1/2" square ruler and line up the center point of the checkerboard with the measuring lines for 6 1/4" in both direction on the ruler, then adjust the rotation of the ruler so it's sides parallel the sides of your block. The setting fabric should extend beyond the ruler on all sides, and there should be at least 1/4" of space beyond all "points" on the block.
Trim block to 12 1/2" square.


