
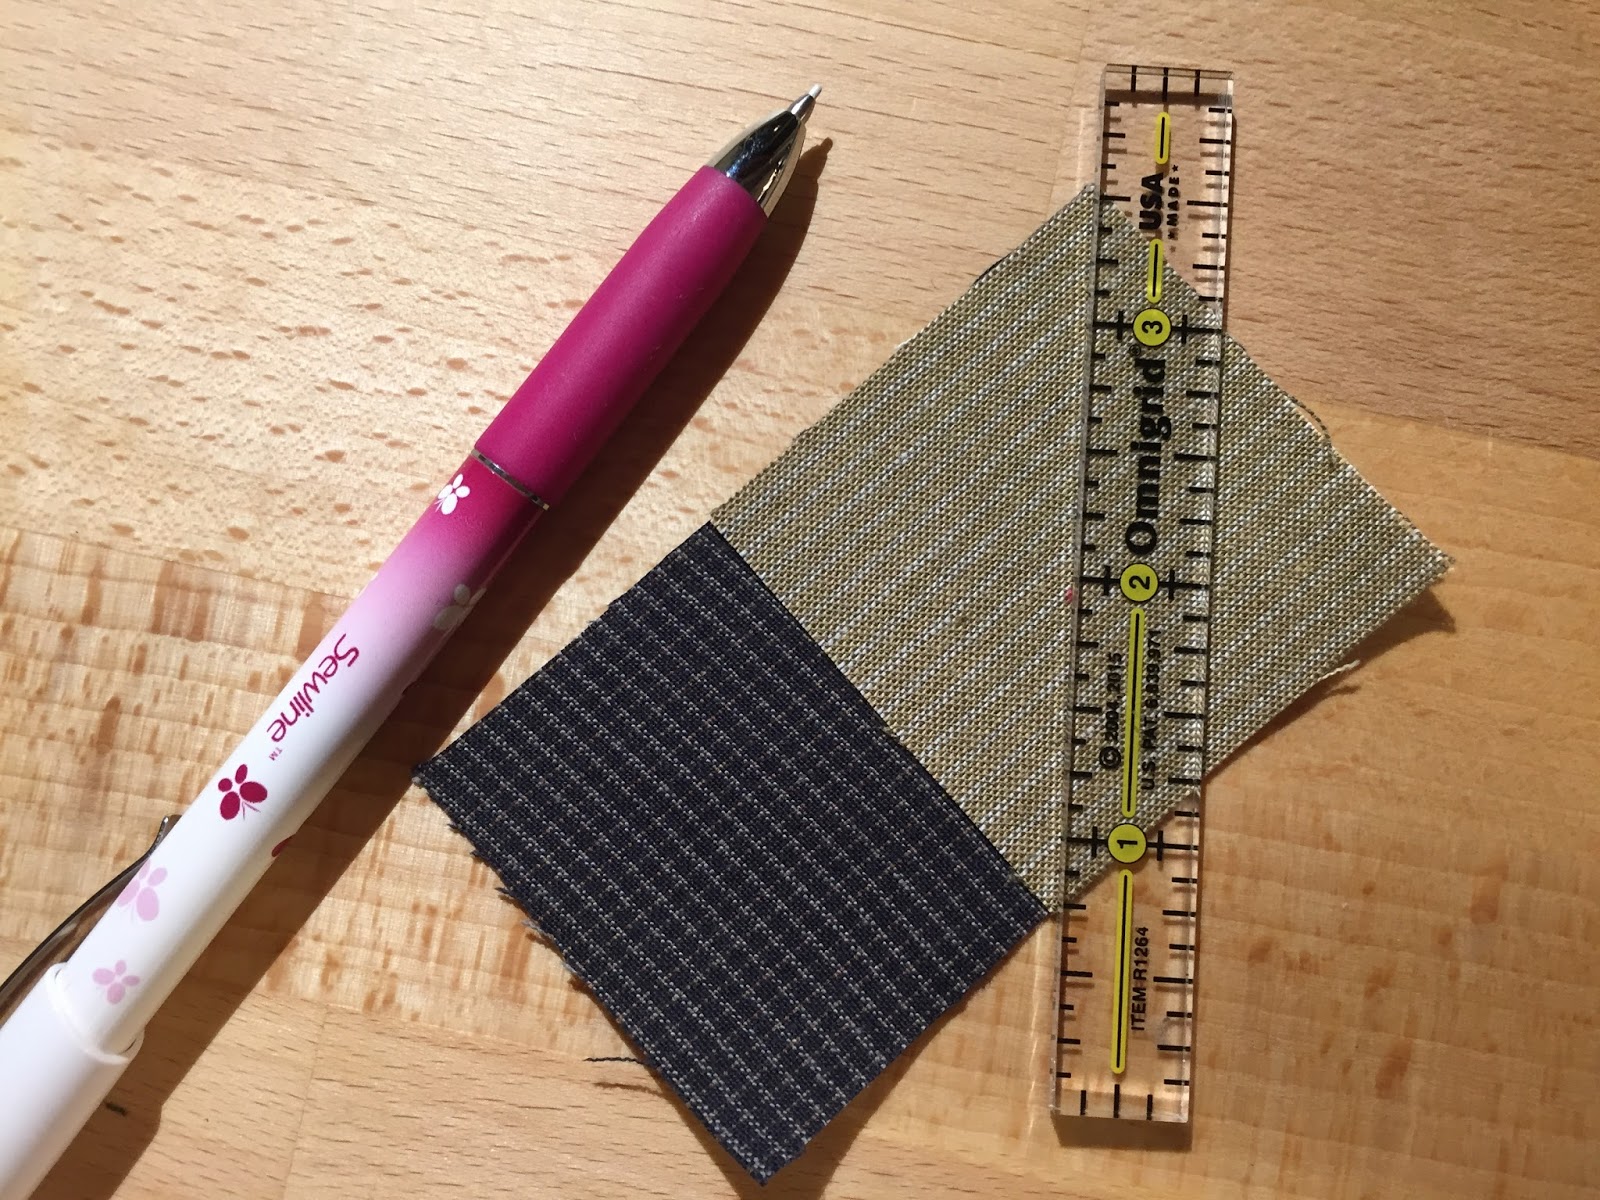
I have selected these 6 fabrics at left, with the top three used for the larger, outer star, and the bottom 3 used for the smaller, inner star.


Be sure when you are cutting your pieces, to cut the triangles for A, B, and D as half square triangles, and the triangles for C as quarter square triangles (as pictured in the center above). This will assure that the outside edges of your block will all be straight of grain.
 Note that my medium dark fabric for the background of the inner star (charcoal gray) is just a bit lighter than the pure black fabric (dark), and I have also chosen two lights for the center star. One goes in the center (space d) and the other is used for the star points (space c). Although the two lights are very similar in value, they have a nice variation in texture.
Assembling the pieces is pretty straightforward according to the printed pattern. Sewing pieces A and B together to form the outer corner squares of the block, and sewing D's to triangle C making flying geese units that are used as the outer star points.


Be sure to trim down your half square triangles. Line up the diagonal reference line on your ruler with the diagonal seam, and trim to 3 1/2" square. Also, trim your dog ears off your flying geese units. It will make your final seams less bulky, and the finished block will lay flatter.


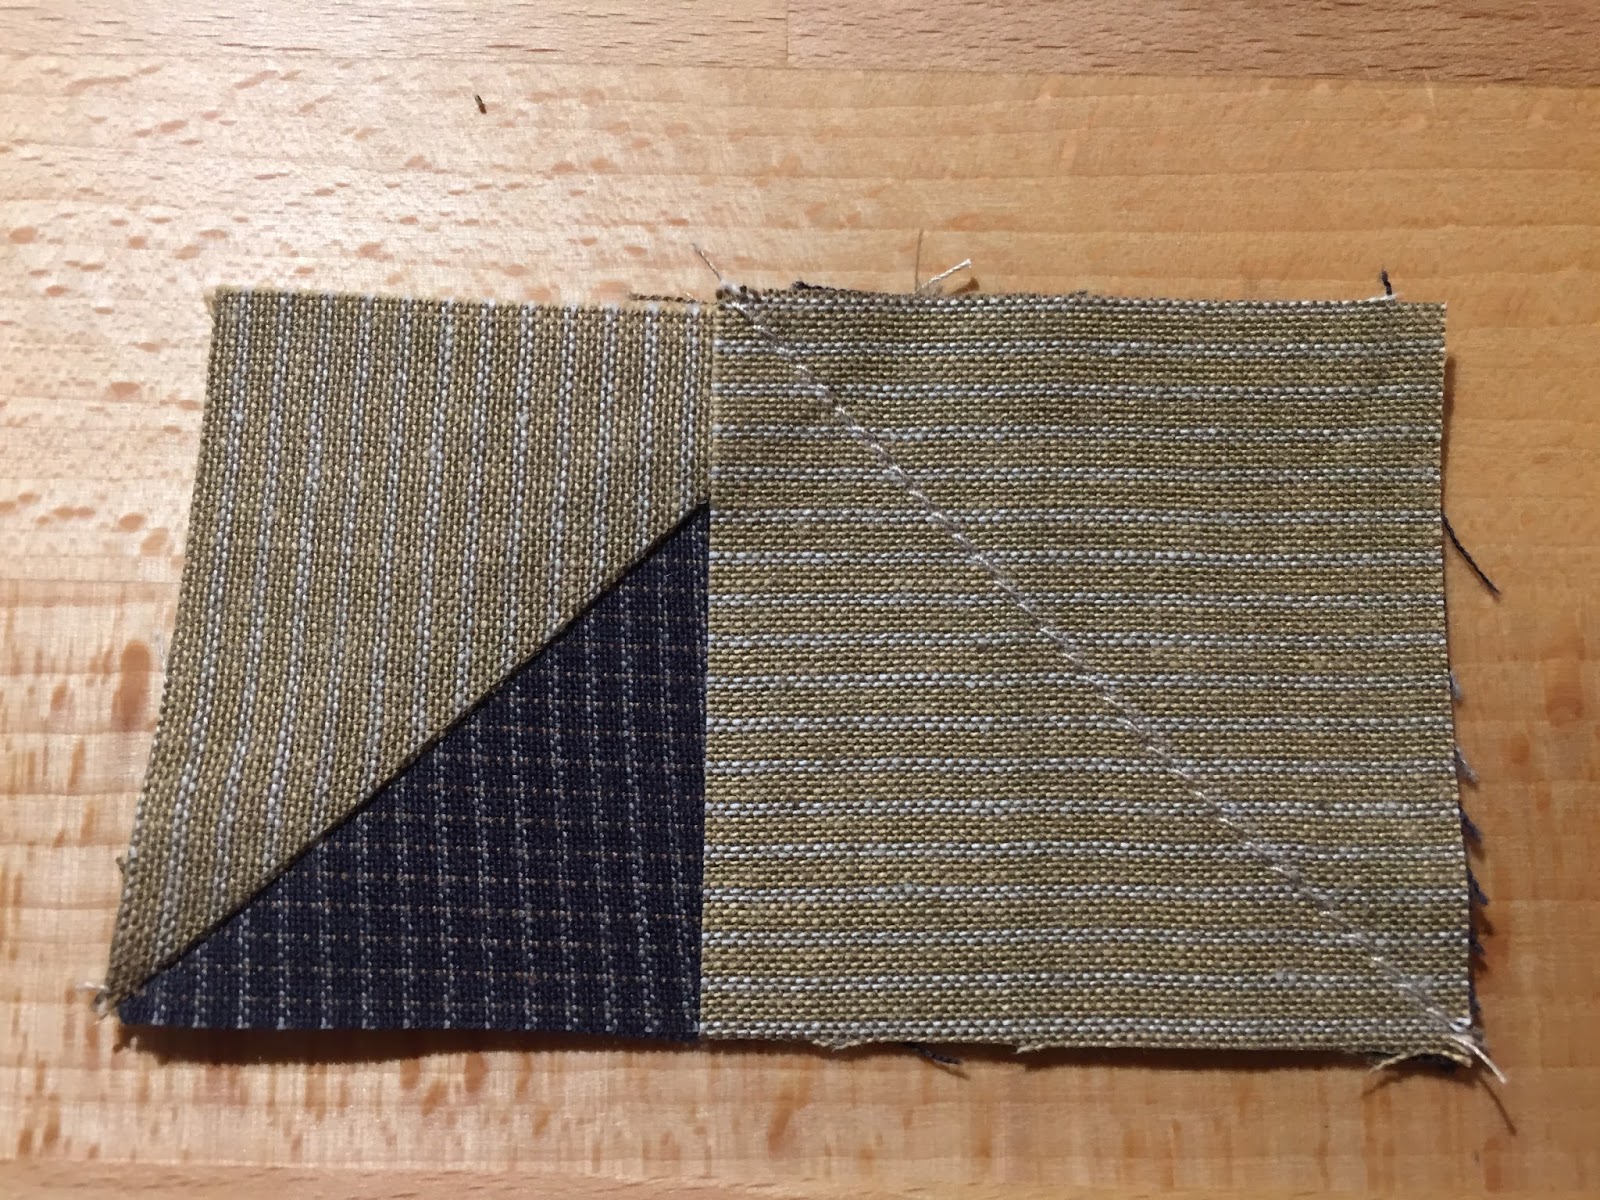
The flying geese units for the inner star points are made using a slightly different method. Start with a rectangle and a square. Lay the square over one side of the rectangle aligning the edges. draw a line on the diagonal of the square, and sew on that line. Trim excess fabric beyond 1/4" from the seam. Flip and press the corner. Repeat this with a second square on the other end of the rectangle, sewing the diagonal in the opposite direction.


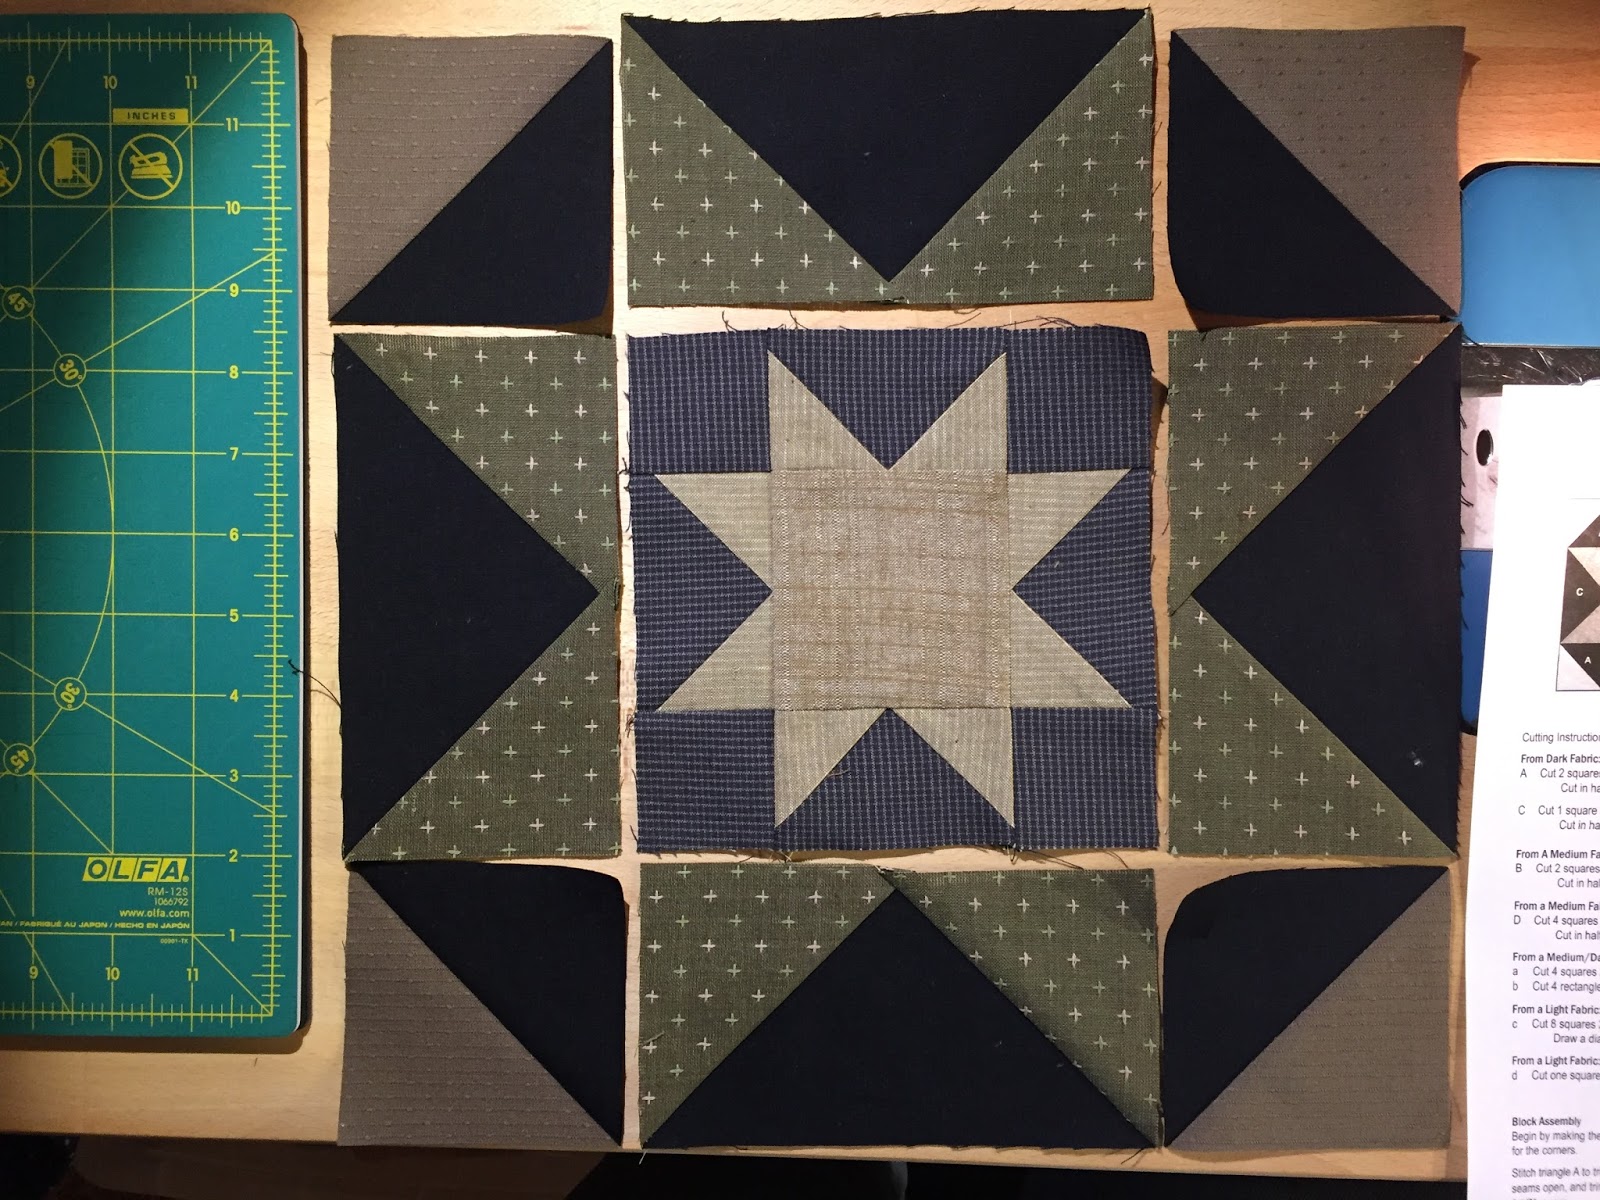 The resulting star block will be used at the center in the larger star. Assemble the large star just as the small one, using the small star as the center, 4 flying geese units, and the 4 half square triangle units as the block corners. Be sure to arrange the HST corner blocks with the light and dark in the correct location.
Put this star together just as before, in rows, pressing the seams in the same direction we did for the small star. You will likely find the final two row seams on the block will want to be pressed open to help your block lay flat.


Your block should measure 12 1/2" square and will finish in the quilt at 12". If you should have any questions, or would like to leave feedback about this block, or the Twilight Gardens quilt, use the comments section below.
Thanks for following along.
Thanks Steven for your very detailed explanation and thoughtful commentary. The pictures of the fabrics is very helpful and the colors in the pictures true to the original. I am excited to get started! I have never been on any blog before, but I'm so excited about this quilt I thought I'd give it a shot.
ReplyDeleteJackie - Thanks for your comment. I appreciate knowing that the photos I am posting are true to color (at least on your display). It is nice to have you following along. Welcome to the blogging world. And, please let me know if you have any questions. - Steven
ReplyDeleteI heard that yarn dyed fabrics may bleed. I usually wash my fabrics first. I know you recommended not doing that. I am just concerned that the very dark colors will bleed onto the light cream color. And since this will be a lap quilt, at some point I will need to wash it.
ReplyDeleteJackie, I am so sorry for the delay in answering your question regarding color fastness of yarn dyed fabrics. Between end of year accounting, and our Winter fabric club shipments, I have to admit, it has been over two weeks since I have been on the blog. I appreciate your phone message. Going forward, I should be more timely with my responses.
DeleteAlthough we can never be 100% sure about fabric dyes, especially with all the fabrics on the market, I have to say over the years I have worked with yarn dyed fabrics, I have never known them to bleed. The threads of these fabrics are dyed and rinsed prior to being woven into cloth, so unlike print fabrics, where dyes are applied after weaving, these dyes have been washed once already. Of more concern to me is shrinkage, which can be noticeable with yarn dyes. Unfortunately, the loose woven nature of these fabrics causes a lot of fraying with standard washing, and small pieces will be greatly affected by this. With so many fat eighth yard pieces included, I do not recommend pre-washing the kit fabrics. My recommendation is to assemble the top, then stay stitch, or serge the edge all the way around, and hand wash the top gently, roll in a towel to remove excess water, then line dry and press. After the top has been layered, quilted and bound, gentle machine washing and drying will be fine, just as with any well made quilt.
To ease your mind about darker fabrics specifically bleeding into the cream fabric, you might want to gently pre-wash by hand, just the 2 or 3 darker fabrics that will actually contact the cream appliqued flowers in block 7 (the background, stems and leaves), I will leave this up to you. I feel strongly, however, that it is not necessary.
In the end, it comes down to personal preference. If you do choose to pre-wash individual fabrics, It will help to stay stitch around the edges, or pink them, and then very gently hand wash, then air dry and finish with an iron.
The result of your work is beautiful, brings joy. Thank you)))
ReplyDeleteThank you for your nice comment.
DeleteHi Steve, I finally started on my first block and as I am about to finish I began to wonder if I selected the correct medium fabric for the outside star corners. It seems to be almost the same color as what I assume is the fabric for the inner border of the quilt.
ReplyDeleteFirst, I must say that there are no correct and incorrect choices in a scrap quilt. The large amount of fabric choices in our kit assures that each person's quilt will be a little different from one another. That is the beauty of scrap quilting. If you have chosen a fabric for the outside star corners from the "Medium" group in the kit, you will be fine. The inner border fabrics are the two 1/3 yd. reddish ones included in the "Dedicated" group, and they are noticeably different in color than just about all the other fabrics. And, if you have chosen one of these red fabrics to include in your block, you always have the option of adding in another fabric later for the inner border if you prefer. Just remember, there are no rights and wrongs, just choices along the way. And, with the large variety of fabrics in the project, adding in a few more of your choice is always an option, and encouraged.
DeleteHi Steven- Please see my concern above about the color fastness. I am still concerned that if I don't wash the fabrics first they very dark colors in this quilt will run into the cream. Do you know if they are truly colorfast? Otherwise I think I will have to gently wash them by hand, to avoid the fraying, just to be sure I don't run into bleeding issues down the road.
ReplyDeleteHi Jackie, See my response on your previous comment. Thanks.
Deletesalt likit
ReplyDeletesalt likit
dr mood likit
big boss likit
dl likit
dark likit
VUUV
شركة مكافحة حشرات بالجبيل
ReplyDeleteyr5l4g085vXp
Thanks for the great article.
ReplyDeleteمكافحة حشرات مكة